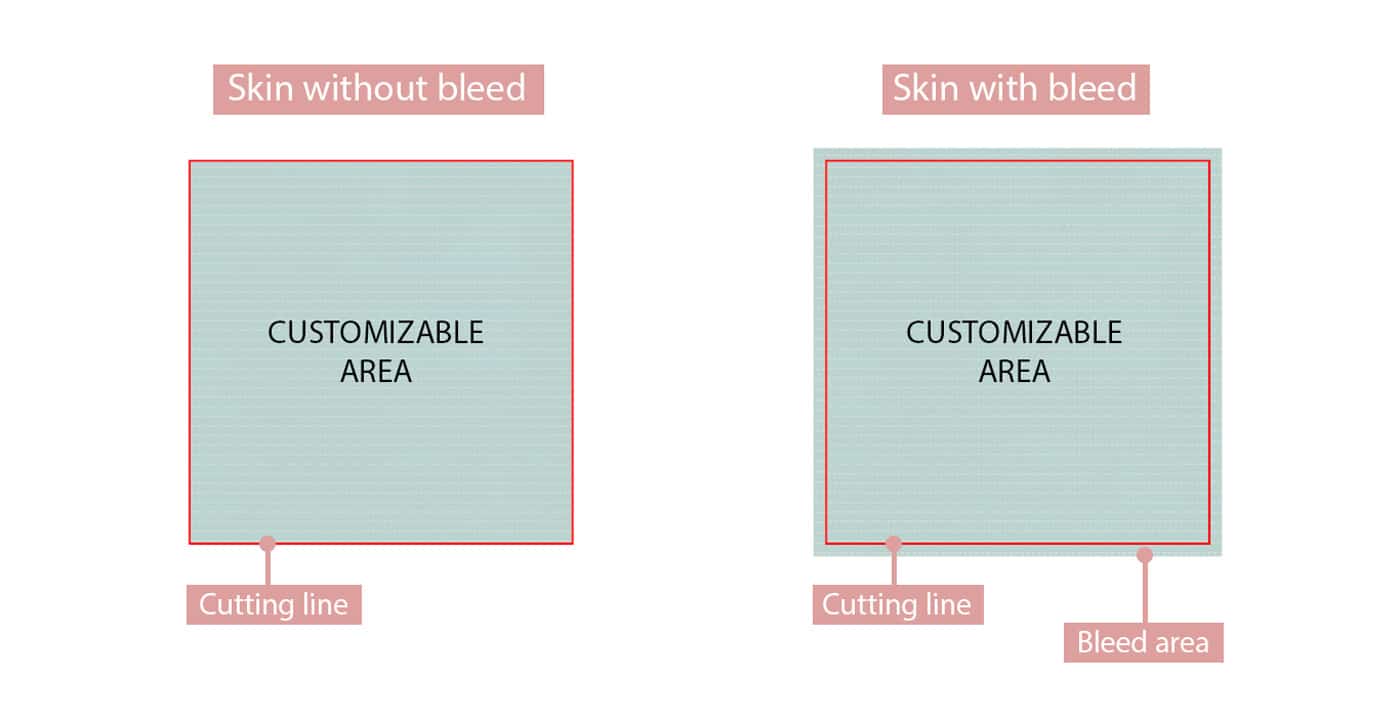
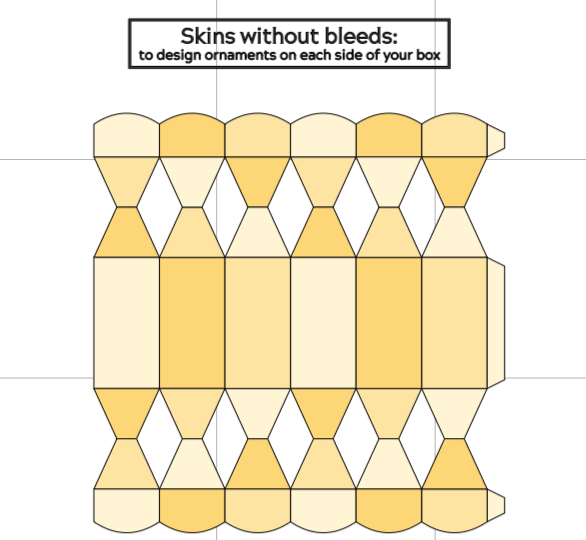
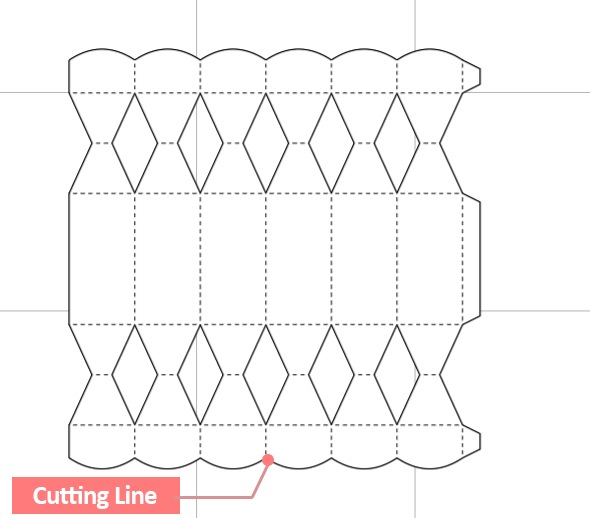
They have the exact same size of the cutting area and they are very useful to create frames, shapes or details on each side of your box. There is no space for artwork outside the cut line:
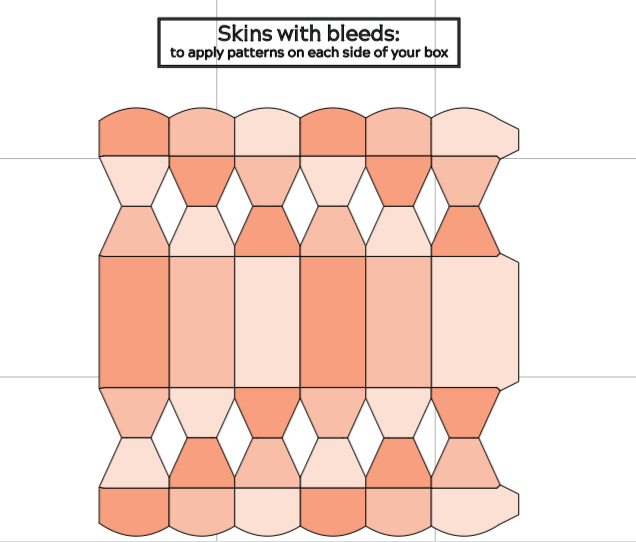
Customizable skins with bleed
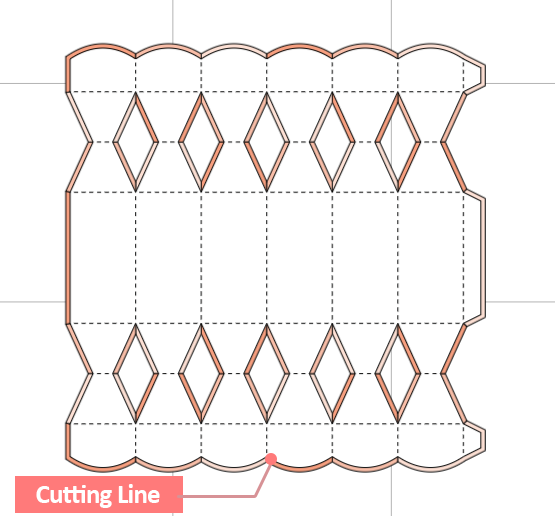
They are a little bigger than the cutting area, so the fill runs beyond the cutting lines, creating a safety margin. With the bleed area added, you’ll avoid any misalignment and white borders while cutting your projects.
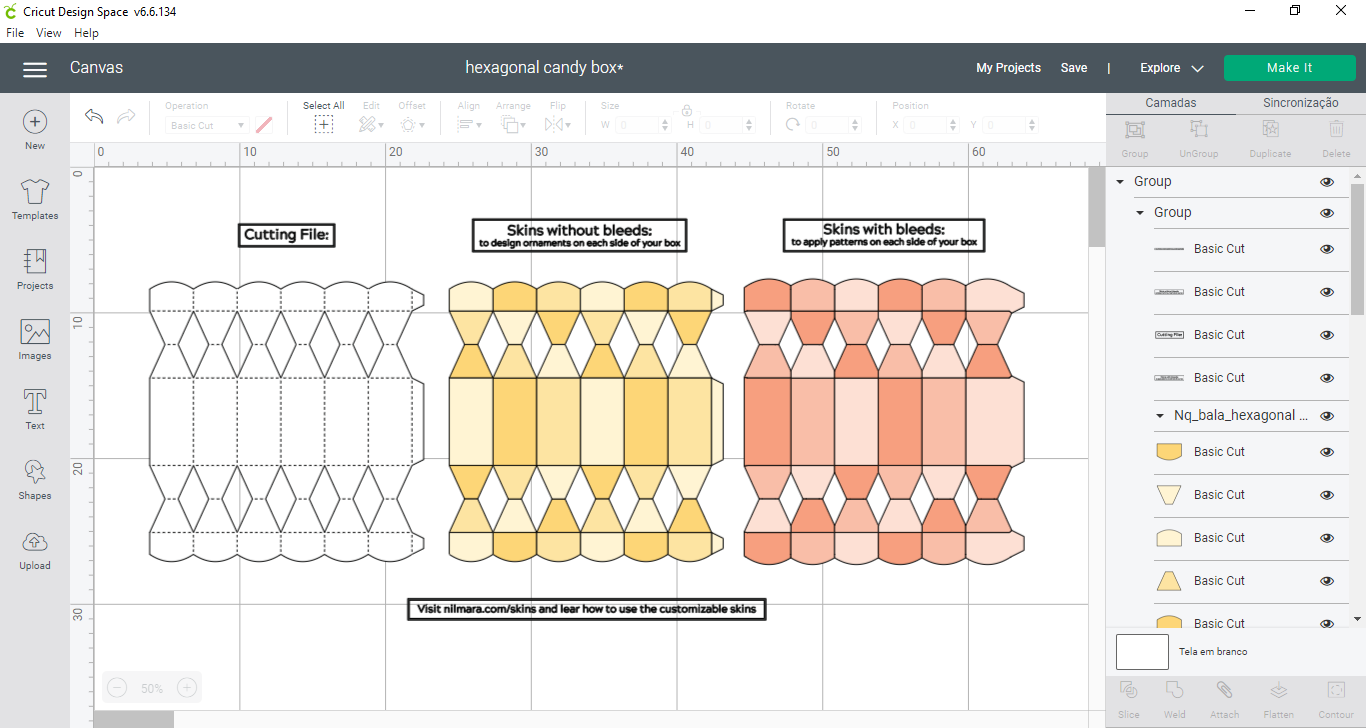
At first, make sure the customizable skins are ungrouped. To find the ungroup tool you must select your project, click with the right button and click on ungroup, or click on ungroup on the sidebar.
As Cricut already has a native bleed feature, it is recommended to use Skins without bleed to create your personalization. To make it easier, hide all objects that you will not use.
Our files are made to be versatile, regardless of the cutting machine you use. Since the Design Space has a native feature to create bleeding, we recommend you using the Skins Without Bleeding if you want to customize your project directly on Design Space